View Invoices
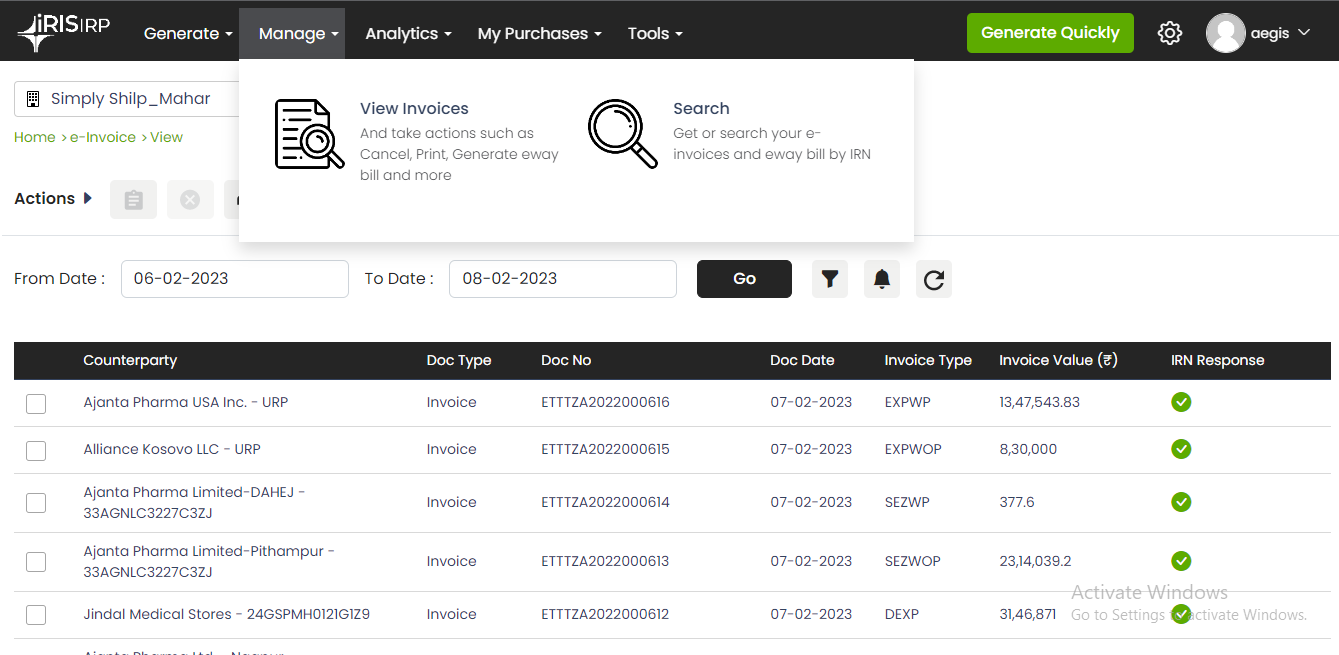
All the E-invoices generated through IRIS IRP can be viewed and managed from Manage > View Invoices
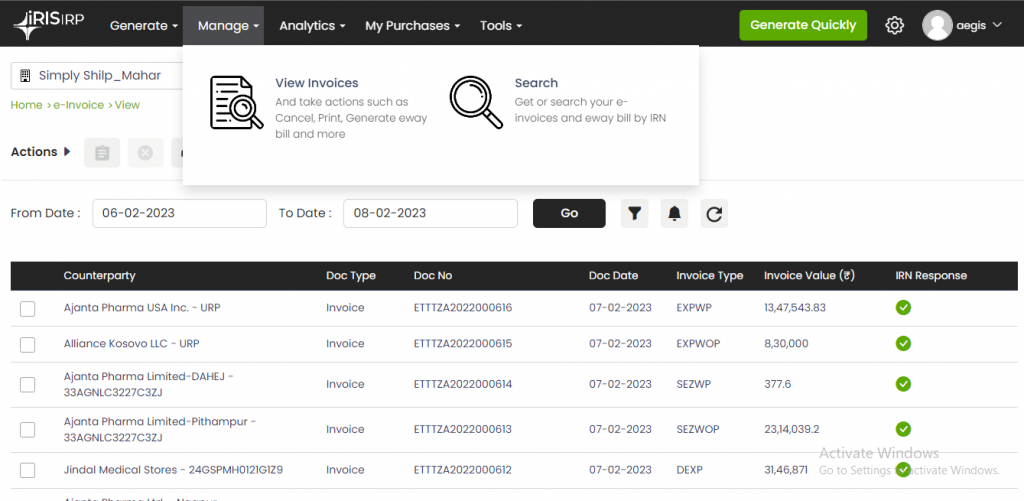
User can get summary and detailed view of E-invoice from this section. User also has option filter the records using different parameters
Generate EWB, Cancel IRN, Send Mail, Send Bulk Mail, Print, Download JSON, Download CSV for Single or Multiple records are the different actions available for User
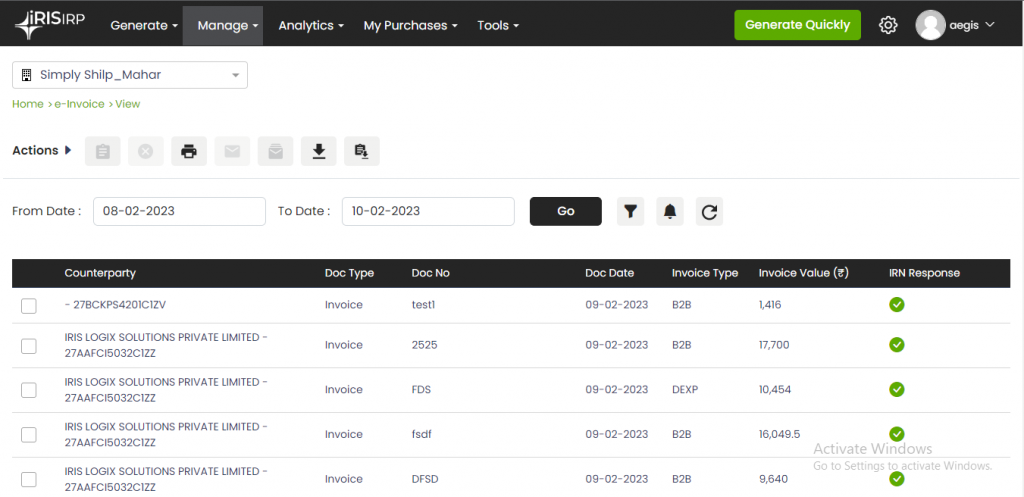
Here, list of all the invoices generated in past two days I.e., having ack date of past two days is available by default.
E-invoices having ack date of prior 2 days will only be available in this section. If user intends to view records prior to past two days, user shall upgrade to VAS or VAS Premium plan
Following details of E-invoice are available in this list
- Counterparty – GSTIN and Trade name of counterparty is shown. Where trade name is not available legal name is shown
- Document Type – Invoice, Debit Note or Credit Note
- Document Number
- Document Date
- Invoice Type – B2B – Regular B2B invoice with registered counterparty, EXWP – Exports with payment, EXWOP – Exports without payment, SEZWP – SEZ with Payment, SEZWOP – SEZ without Payment
- Invoice Value
- IRN Response – Green icon resembles IRN generated and red icon resembles IRN cancelled
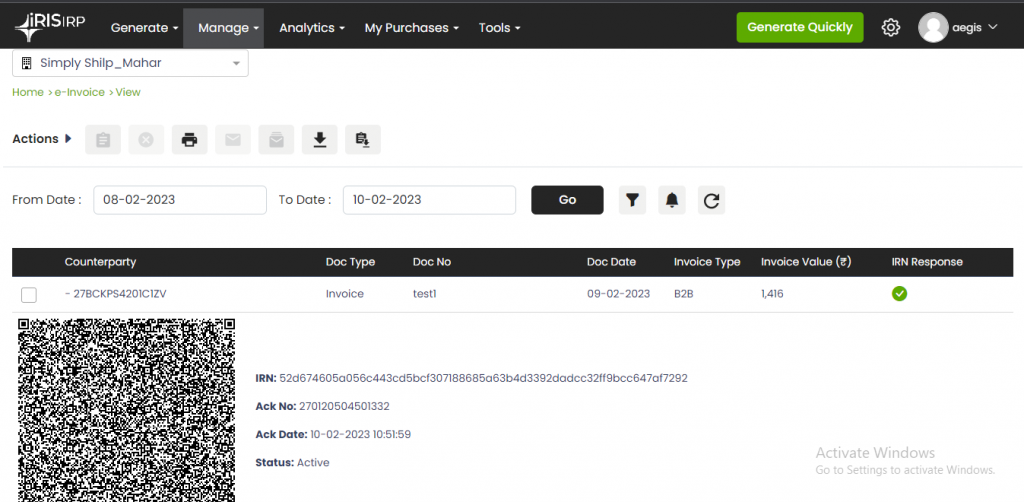
On click of these icons’ user gets an extended record of invoice with following details - QR Code
- IRN – 64-digit IRN duly assigned
- Acknowledgement Number
- Acknowledgement Date
- Status – Active, Cancelled or Rejected
- Cancellation Date – In case status is Cancelled
Default filter (Acknowledgement Date) – By default records of current day and previous day are available. However, subject to Value added services opted for, user can filter the view
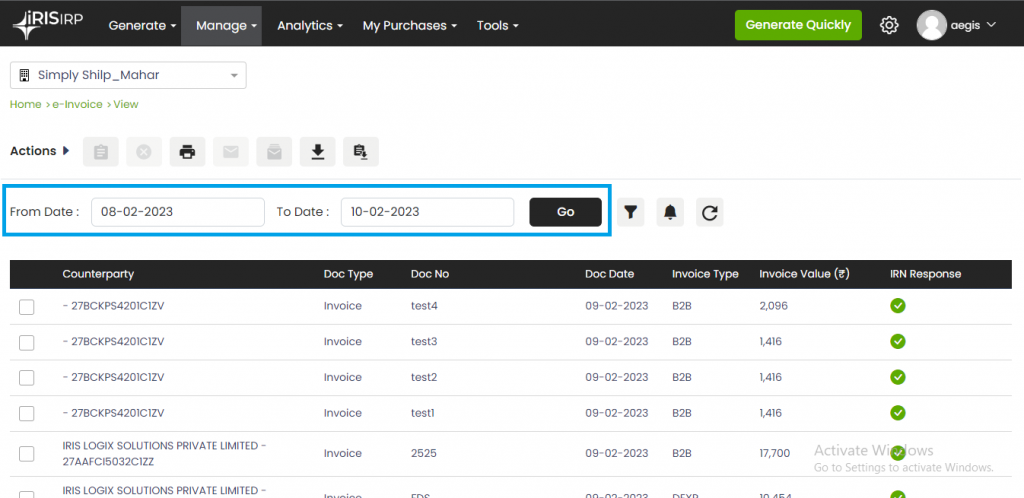
Note: Dates should be within the range of 1 month. And maximum 3 months old data can be seen from here.
In addition to Ack date default filter, user has an option filter the records on other parameters as well. Note, Ack date default filter can be changed but can never be removed. However, below mentioned additional filters are optional and can added, changed and removed at user discretion.

In filters, user can search a particular invoice by
- Document Date – Dates should be within the range of 1 month. And maximum 3 months old data can be seen from here
- Counterparty Name – User can search only one Counterparty Name at a time. Minimum 3 characters are required
- Document Number – User can search multiple document numbers. User shall enter comma separated values without space say Doc1, Doc2, Doc3
Invoice Type – User can search by multiple or singles invoices type such as
B2B – Regular B2B invoices of Registered counterparty
SEZWP – SEZ with payment
SEZWOP – SEZ without payment
EXPWP – Export with Payment of Duty
EXPWOP – Export without payment of Duty
DEXP – Deemed ExportDocument Type – User can search by single or multiple document Type such as
Invoice
Credit Note
Debit NoteCounterparty GSTIN – User can search multiple or single counterparty GSTINs. User shall enter comma separated values without space
IRN Status – User can search with IRN status Active, Cancelled and Rejected. Note: User can select any or all of them
IRN Number – User can search multiple or single IRNs. User shall enter comma separated values without space
Acknowledgement Number – User can search multiple or single Ack No’s. User shall enter comma separated values without space
Note: Print, Download CSV and Download JSON shall function of records filtered using above functionality
If user adds value in any filter but value is not available in the records, then No records message is catered on UI

If user adds incorrect information in filters and apply then it shows an error “Error in Fields” in toast message

- Once request is placed successfully, same is available in Notification bar.
- Request placed may be in progress or completed
- If request is in progress click on in progress moving icon and if it is successful user can download or send mail or do required actions
On Click of refresh icon all the user applied filters are removed and default screen of IRNs generated in past two days is catered on UI
In addition to view and filters user can carry out below actions on any record available
- Generate EWB – Upcoming feature
- Cancel IRN
- Print IRN
- Send Mail
- Send Bulk Mail – Upcoming feature
- Download Json
- Download CSV
Upcoming feature
User can select one or more record and click on Submit. Select Reason and Remark are mandatory fields required from user.
Note: Only Records having active IRN generated in last 24 hours will be considered for cancellation.

User can select any one or more records then click on print IRN. In case user clicks on Print without any record selection, all the records in current view/filter will be sent for Print.
In order to print records, first PDF Document is generated. User has an option Merge PDF. Merge PDF option provides single PDF for all selected records, else separate PDFs will be generated for selected records.

Once Print is initiated user can get the status from Notification icon
If status is in progress: Click on In progress icon to get updated status
If status is success: PDF file is available for download. User can download the PDF file and print the same

User has an option to mail his invoices in PDF or CSV format. However, user shall select single or multiple invoice pertaining to only one counterparty for sharing the same over email.
Once print command is initiated, user has to select attachment type as PDF or CSV for the mail. User can see the download progress in Notification section. Just click on download InProgress icon to get the updated status. Once Status is Success, click on send mail. Refer below screen

After click on send mail user will see the below screen

User email, Subject, Mail body and file attachment is auto populated but user can add and update mail details and click on Send button.
User can select any one or more records then click on Download JSON. In case user clicks on download without any record selection, all the records in current view/filter will be sent for download
In order to download records, user has an option Merge JSON. Merge JSON option provides single JSONs for all selected records, else separate JSONs will be generated for selected records.

After data selection, click on Download JSON user can view the download progress in Notification section, just click on download InProgress and download it. Refer below screen

- Once download JSON is initiated user can get the status from Notification icon
- If status is in progress: Click on In progress icon to get updated status
- If status is success: JSON file is available for download. User can download the JSON file and print the same
- Download JSON File has following parameters of E-invoice – Status, IRN, Signed QR Code, Ack No., Ack Date and Signed Invoice
User can select any one or more records then click on Download CSV. In case user clicks on download without any record selection, all the records in current view/filter will be sent for download
In order to download records, user has an option to download summary or detailed CSV

- Once download CSV is initiated user can get the status from Notification icon
- If status is in progress: Click on In progress icon to get updated status
- If status is success: CSV file is available for download. User can download the JSON file and print the same
- Download CSV Summary File has following parameters of E-invoice – Recipient GSTIN, Recipient Name, Doc Type, Doc No, Doc Date, Inv Value, Ack No., Ack Date, IRN, Status, Signed QR Code.
- Download CSV Detailed File has all the details added for E-invoice generation and details of IRN generation
Search
- Search IRN – Search any E-invoice using IRN (here user may or may not have generated the IRN)
- Search EWB by IRN – Upcoming feature
After click on the search IRN, user will see the below screen
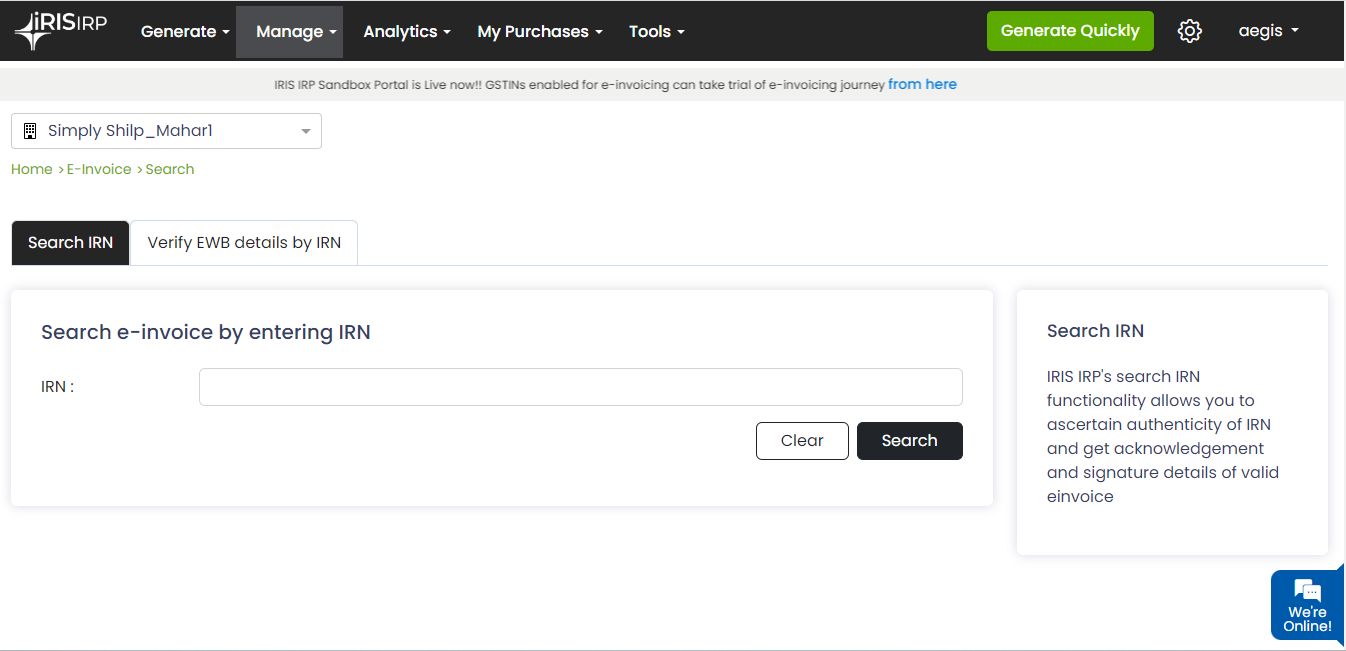
- Search IRN – User shall provide valid IRN to view following information of einvoice in response – IRN, Status, ACK No., ACK Date, Signed QR Code, Signed Invoice. Refer below screen

- If user adds incorrect or invalid IRN then error message is rendered “Requested IRN data is not available”. User can use clear button to clear the invoice details or error details


 मराठी
मराठी 
